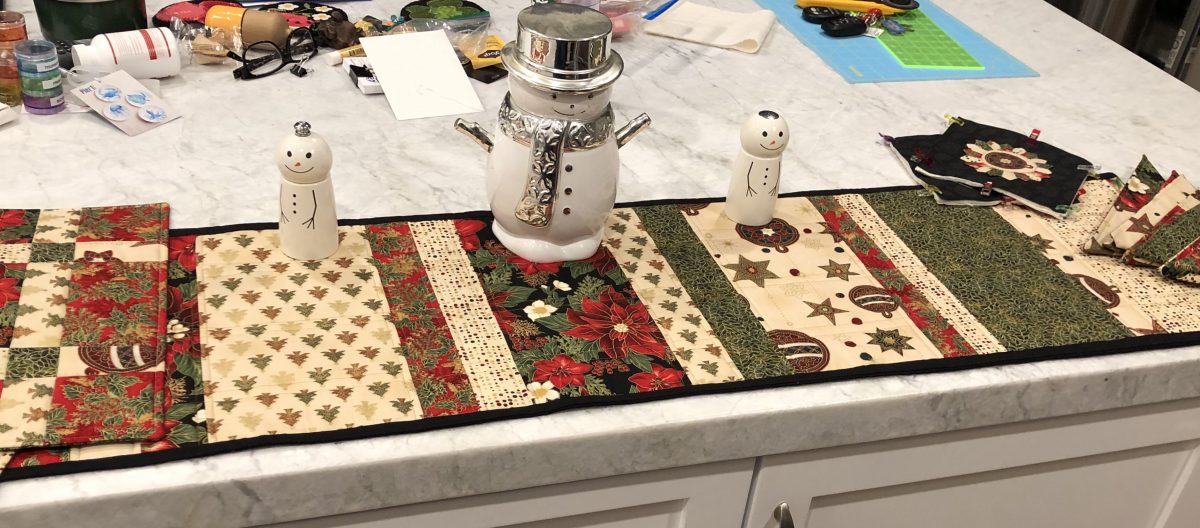
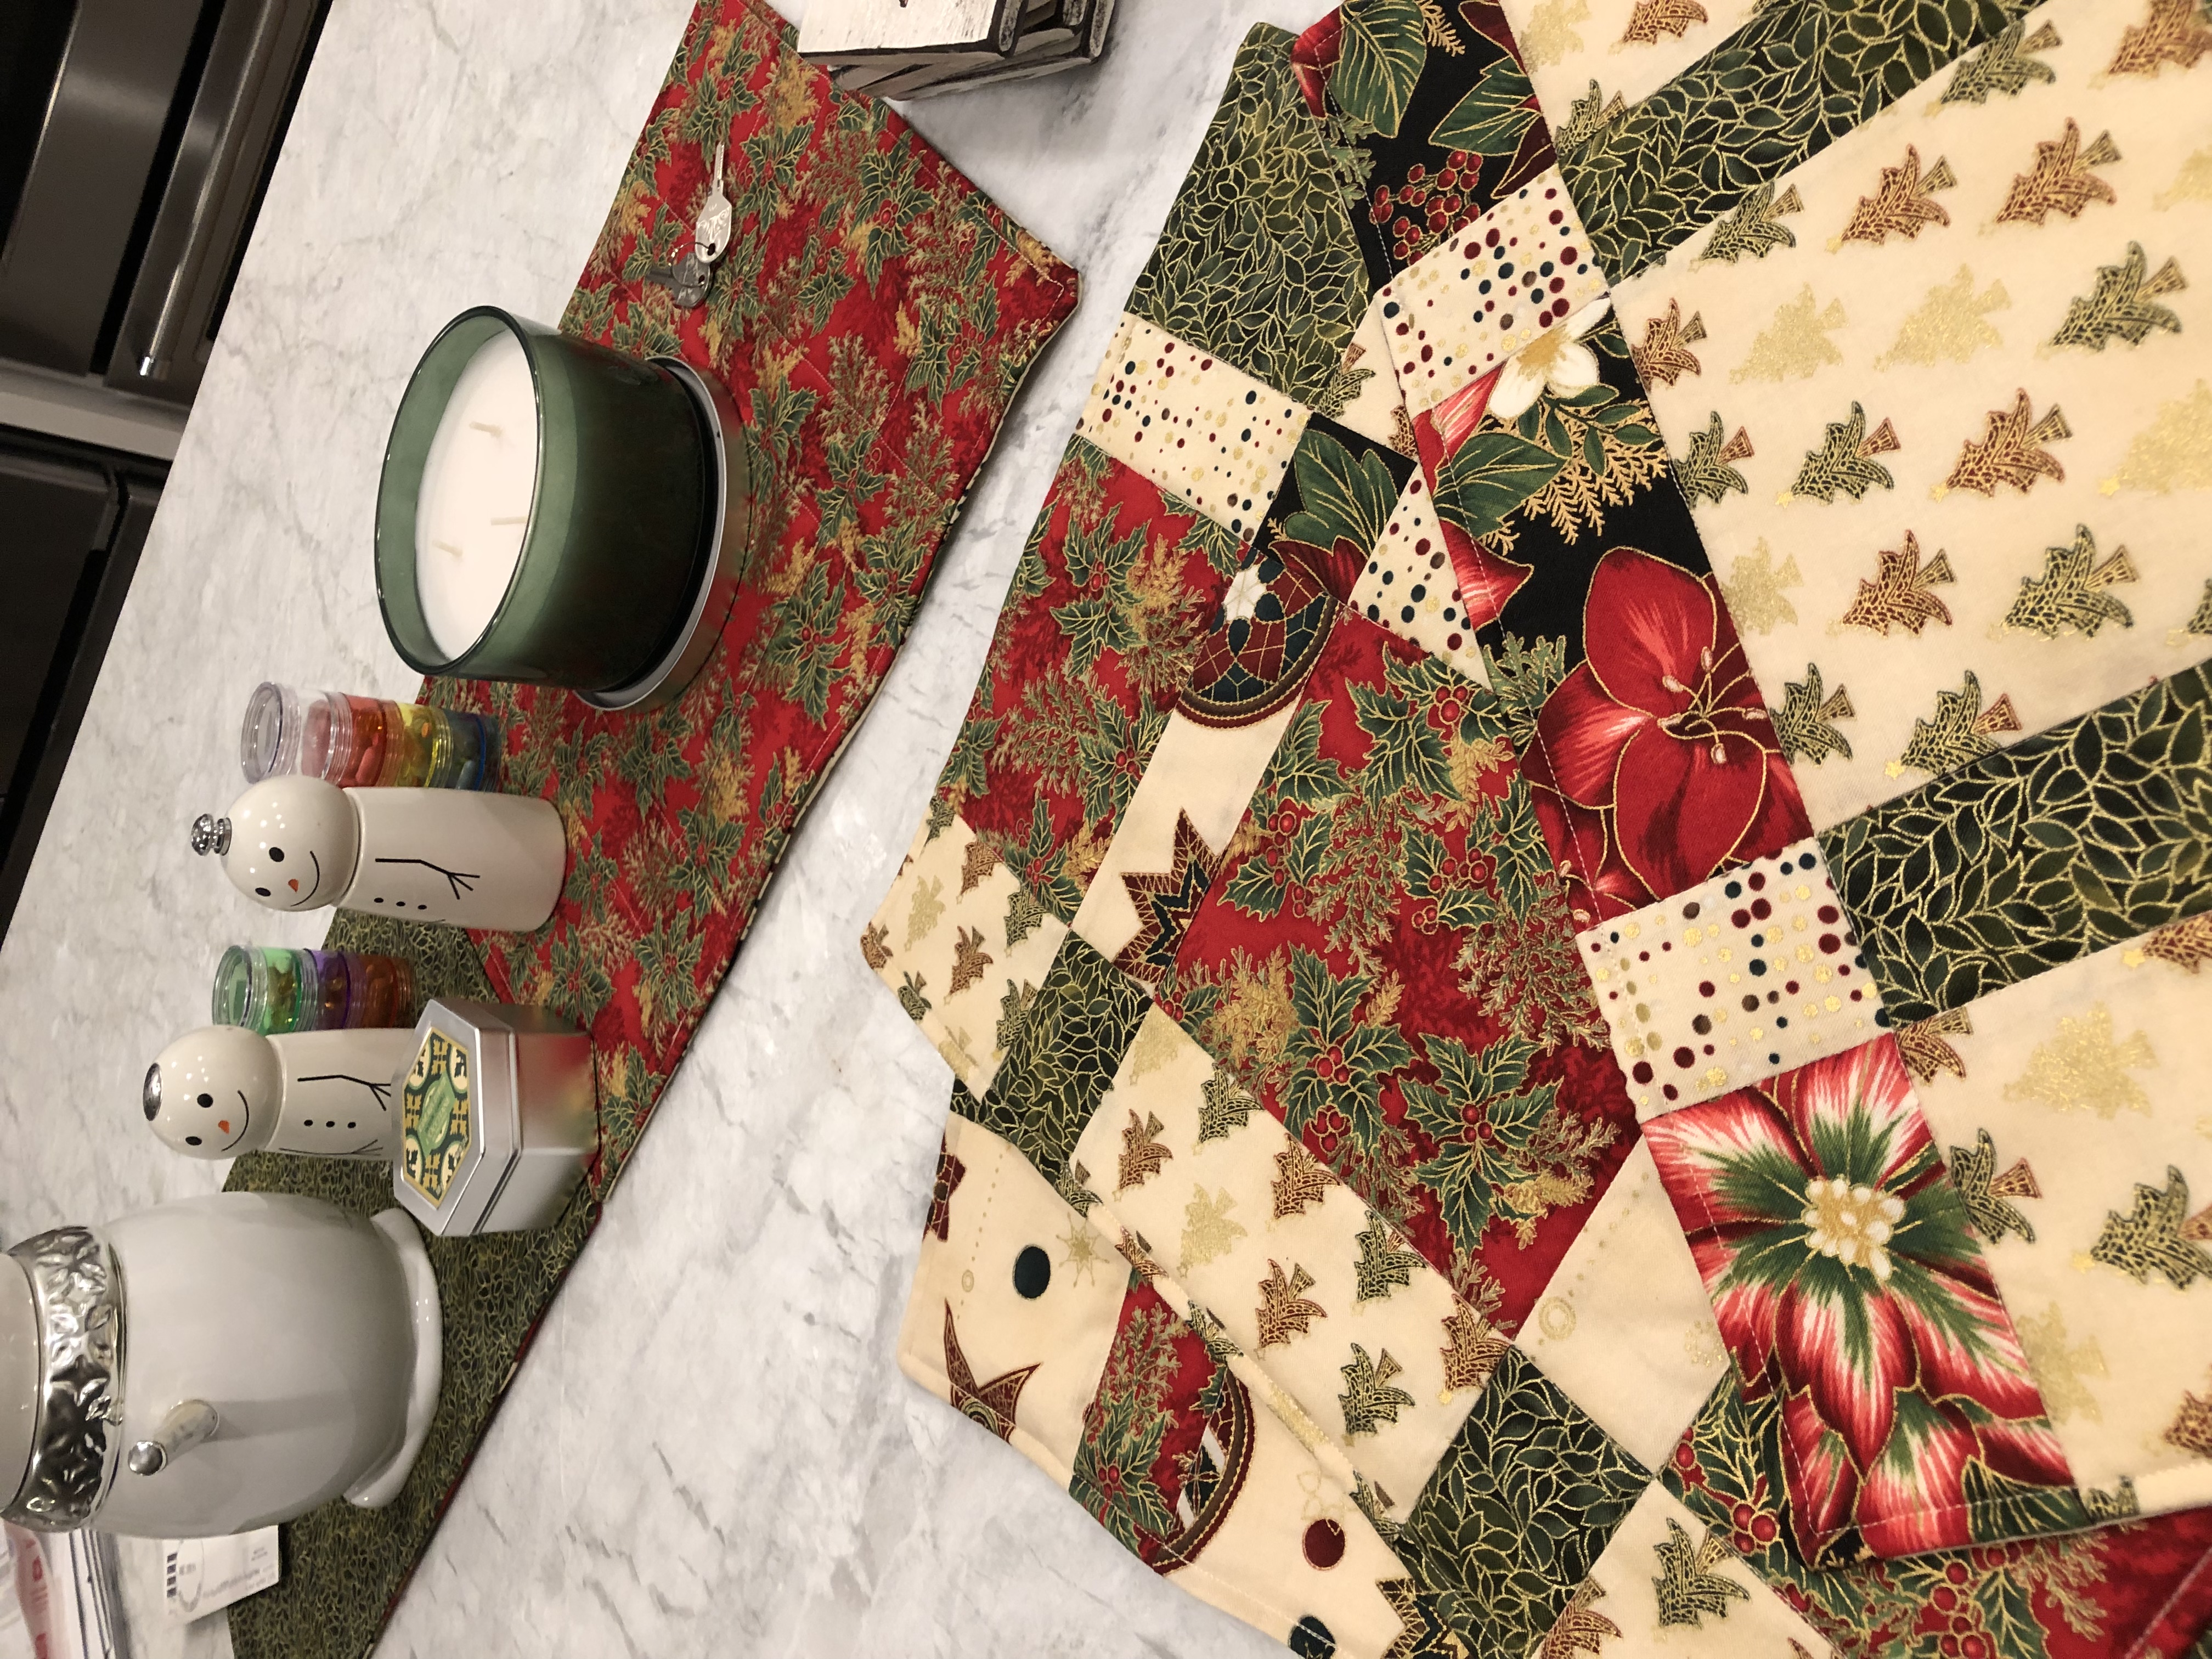
It was exciting to finish up my Christmas place mats, napkins, and table runner this past weekend. I am trying to use up all my left over Christmas fabric so I have started some hot pads with mini dresdens on (#tinydresdenparty2019) They were fun to do but more challenging then the typical dresden being about half the size. I have included a link to Quilty Obsessions website where the directions and template for the mini dresden can be found. Enjoy.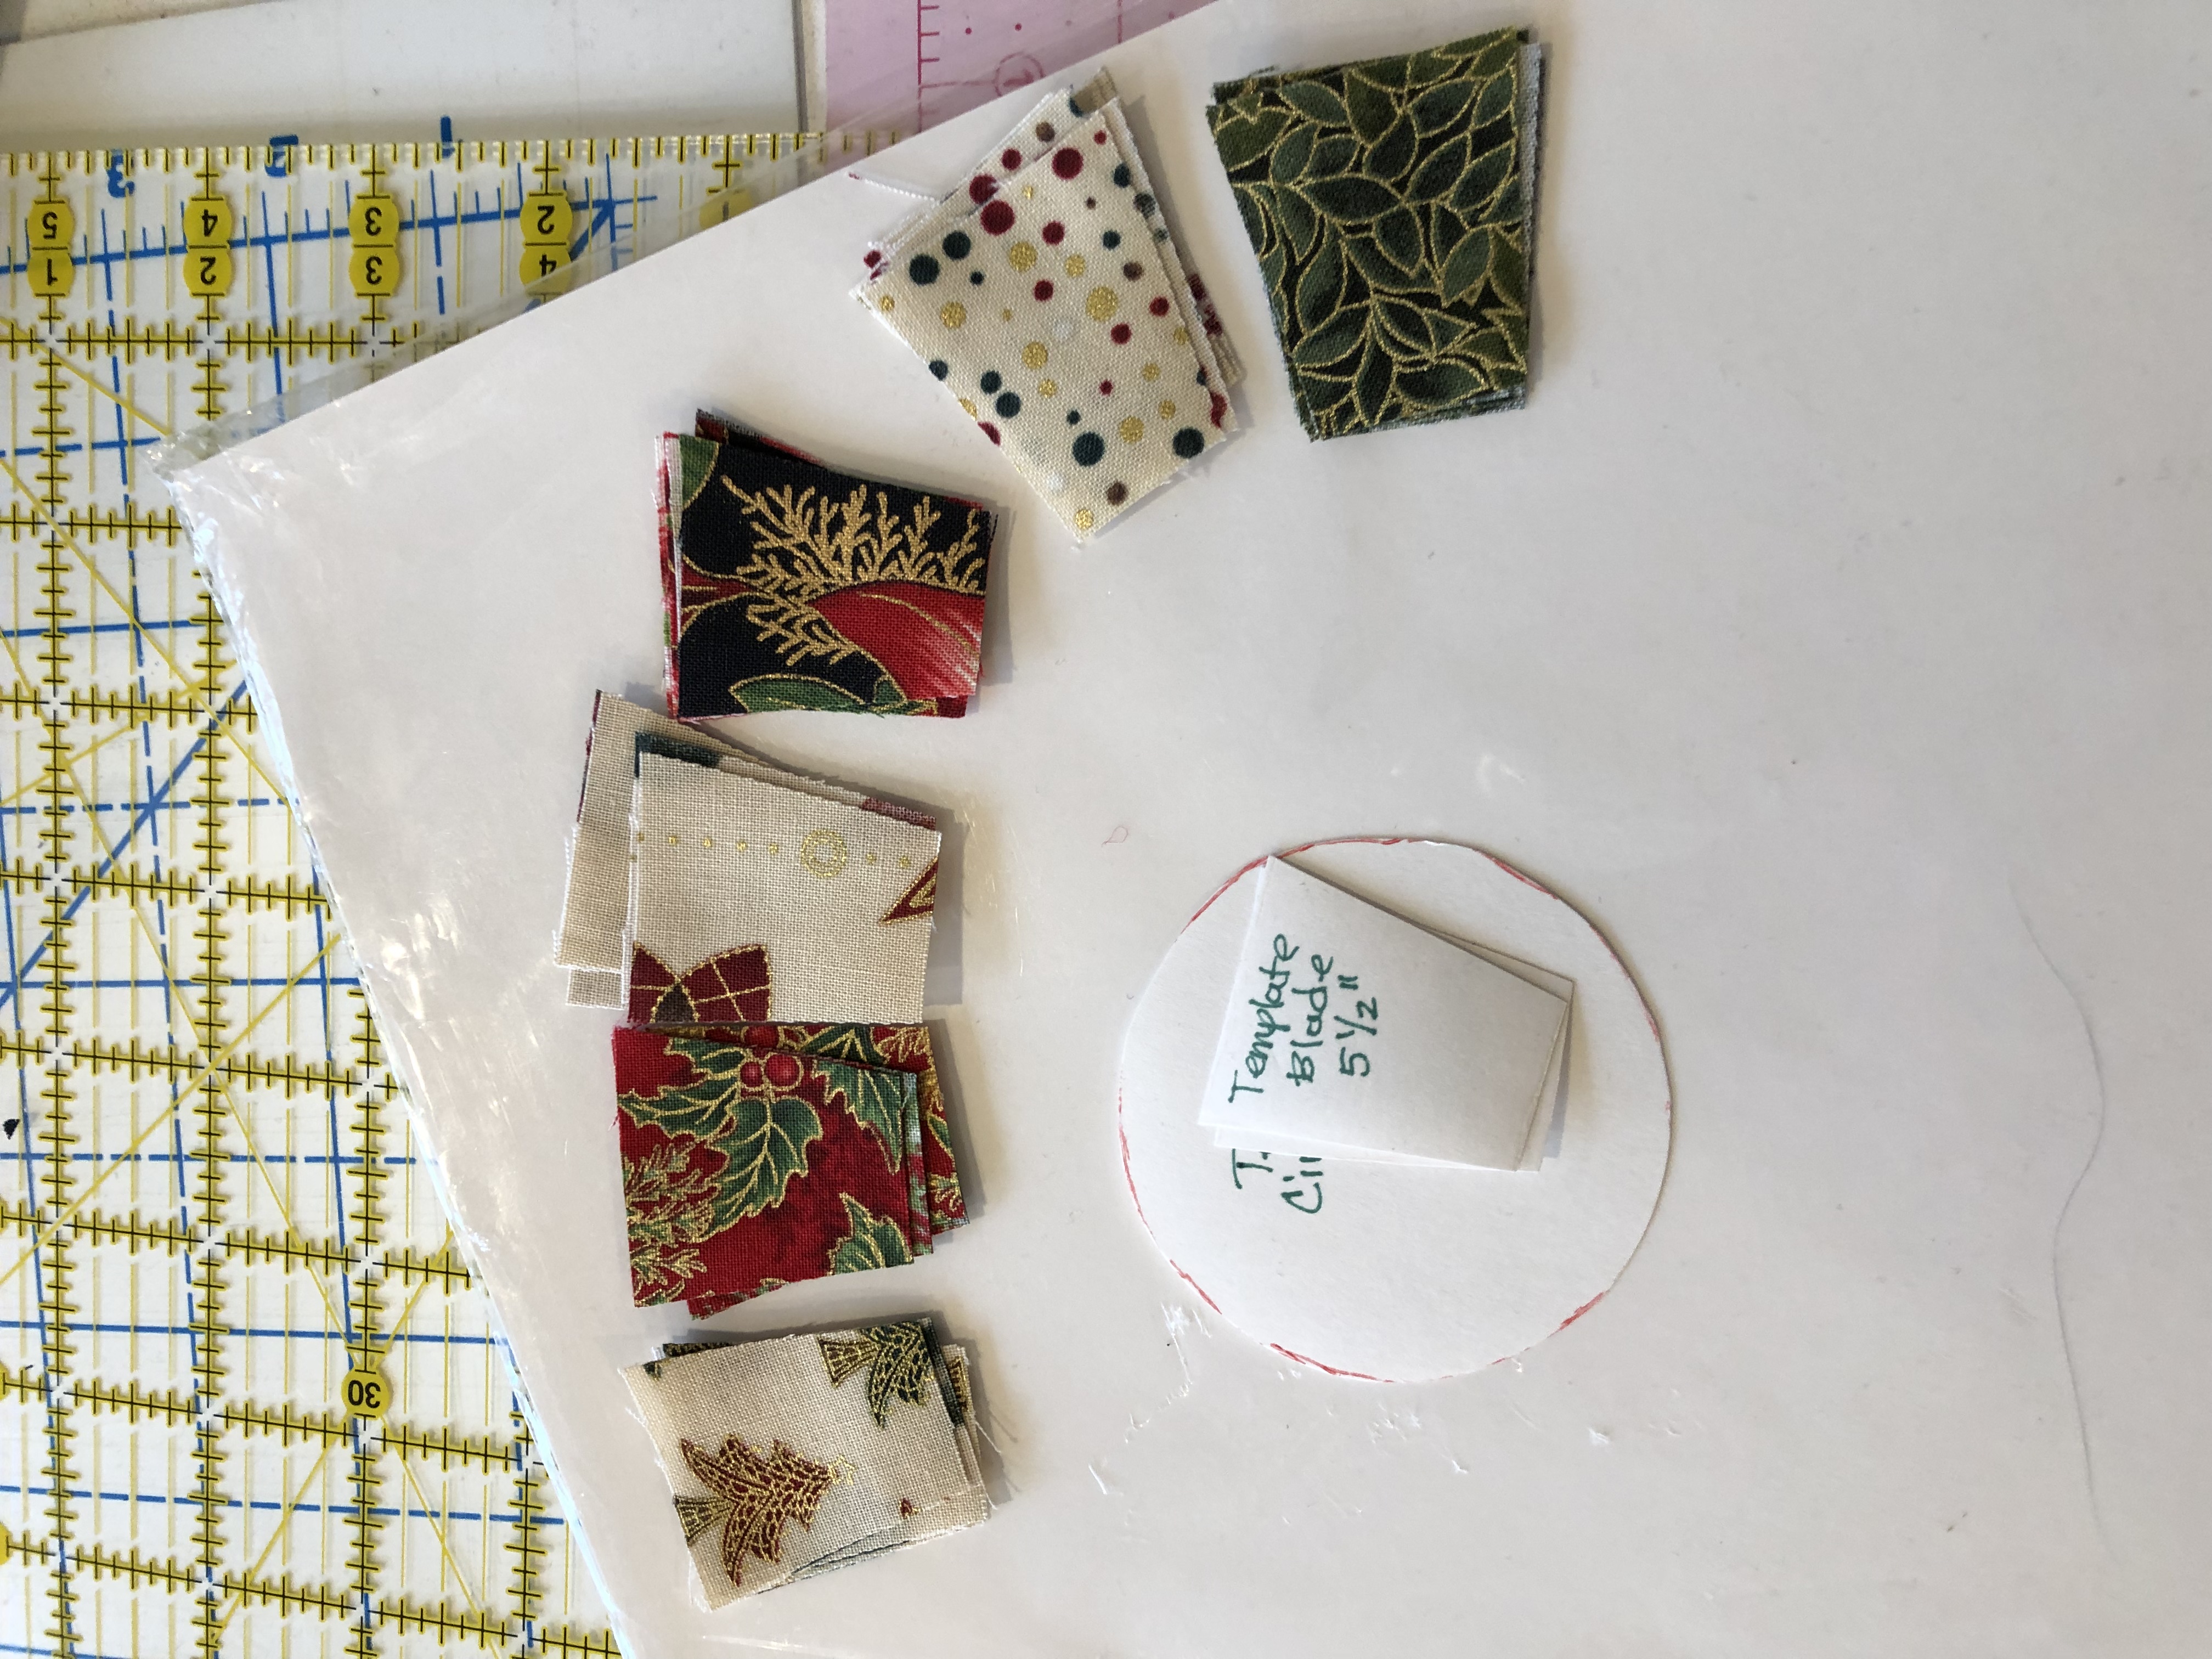
Making the Place Mats
At the point of my Christmas table setting, I simplified to try and actually finish a set (Halloween & Thanksgiving are still WIPs or if you prefer UFOs) So for these place mats I decided on a stack and whack method.
- I want 6 place mats so I bought a yard of 6 different fabrics making sure equal amounts of light and dark so I would have some contrast. I figured out that I was only going to do 3 cuts horizontal and the size of place mat I wanted (14×18). Obviously it could be anything. (Fat quarter bundle could have worked as well).
- The key with this is that all 6 rectangles have to be the same size. I cut my 3 random horizontal cuts after cutting my 6 rectangles. I don’t remember the exact cuts because I didn’t actually measure. I wanted varying widths but made none smaller than two inches.

- Then shifted each stack so that I had dark/light alternating and no two fabrics were together making sure to not mess up the order of the strips. Fairly easy process if you are accustomed to the stack and whack method. (see below).
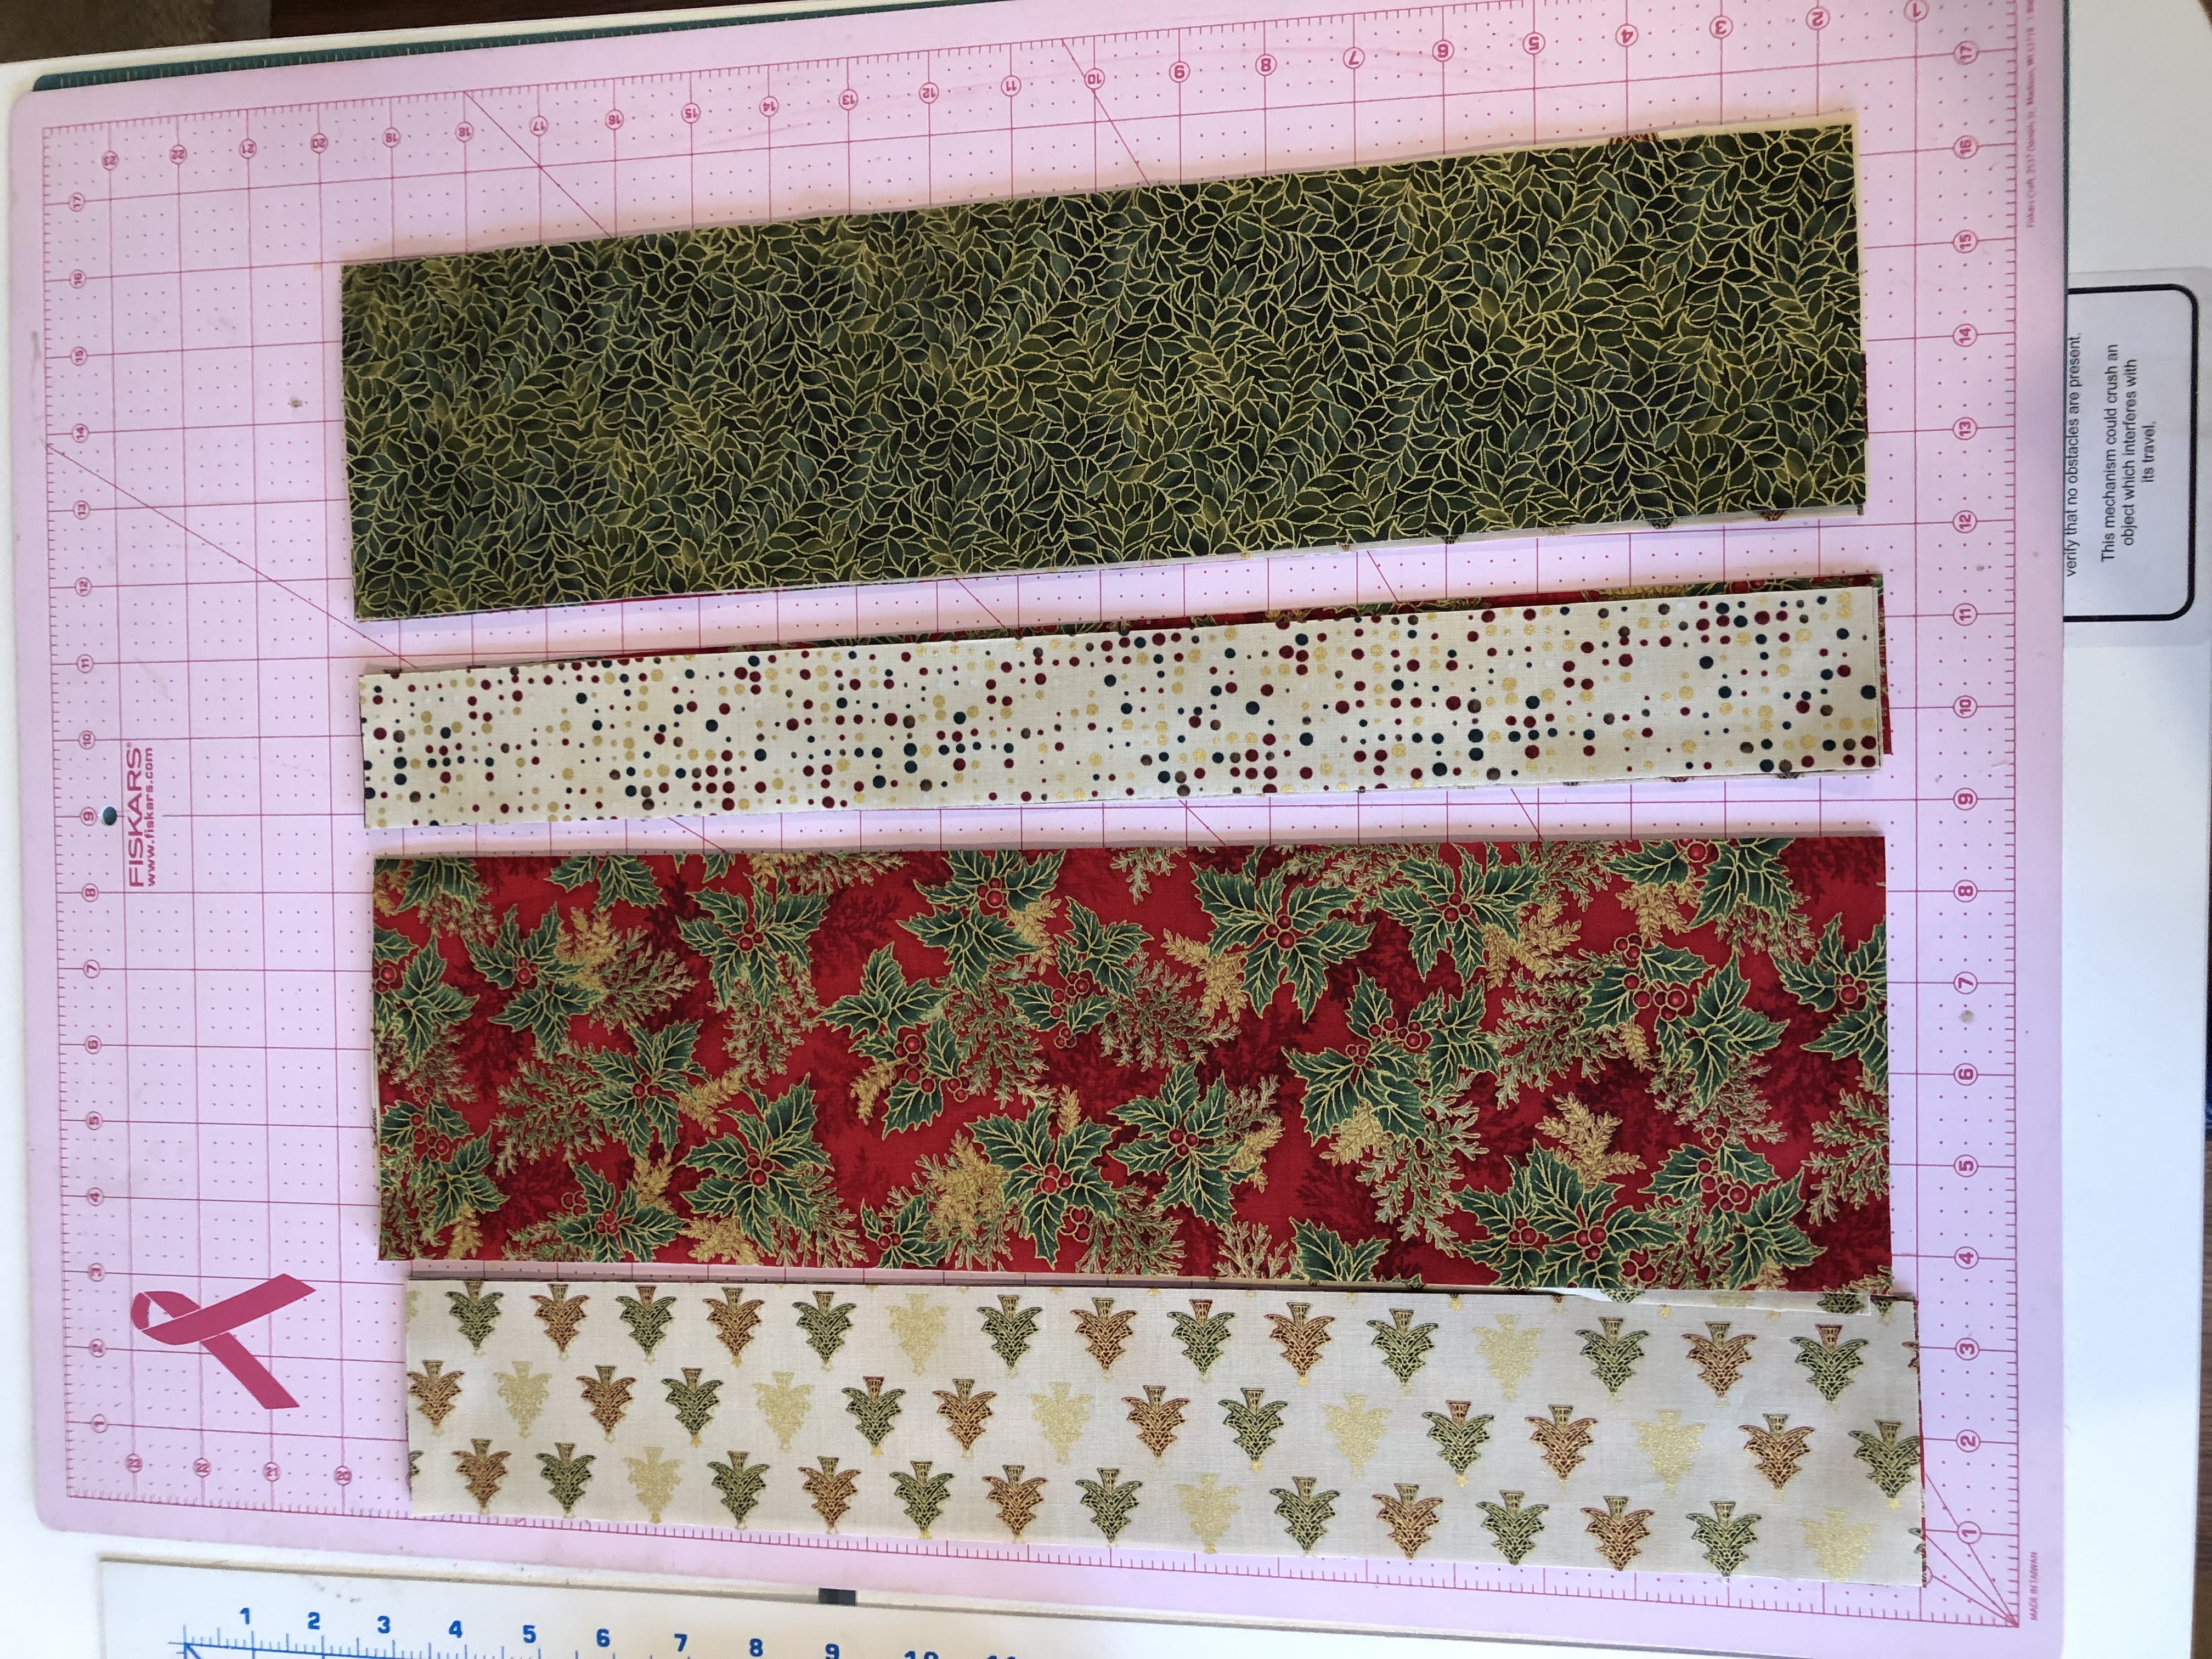
- Then after shifting the fabric, I sewed together 6 new rectangles with strip widths exactly the same order for each rectangle. I personally ironed to the dark side so that in the next step everything would nest nicely otherwise, I would have ironed seams open to have the flattest seams possible.
- With my ironed 6 rectangles stacked with the the varying strip widths matching (for instance 5″ on top and 2 inch on bottom) But it is very important that they are all oriented exactly the same!
- Now I decided that I wanted two skinny strips away from the edge (could be anything once again). I measured this time from the vertical edge and cut two two inch strips on each side (Wide/Narrow/Wide/Narrow/Wide) I had decided in advance how many cuts I would be making so I knew my place mats would be shrinking 1/2 inch for every cut. Just remember there is no Place Mat police so you can do whatever you want. When originally researching place mat sizes I discovered there is no standard at all. Same for napkins. So it boils down to your preference (or how much fabric you have).
- Once again I shifted the skinny strips. For me, I wanted that light/dark contrast and I had decided I wanted my two skinny strips to match. Of course, it could have been anything, but the point of cutting your sewn fabric is to make something different. I went so far as to make sure that I captured all 6 fabrics in each new rectangle. THERE IS NO RIGHT OR WRONG!
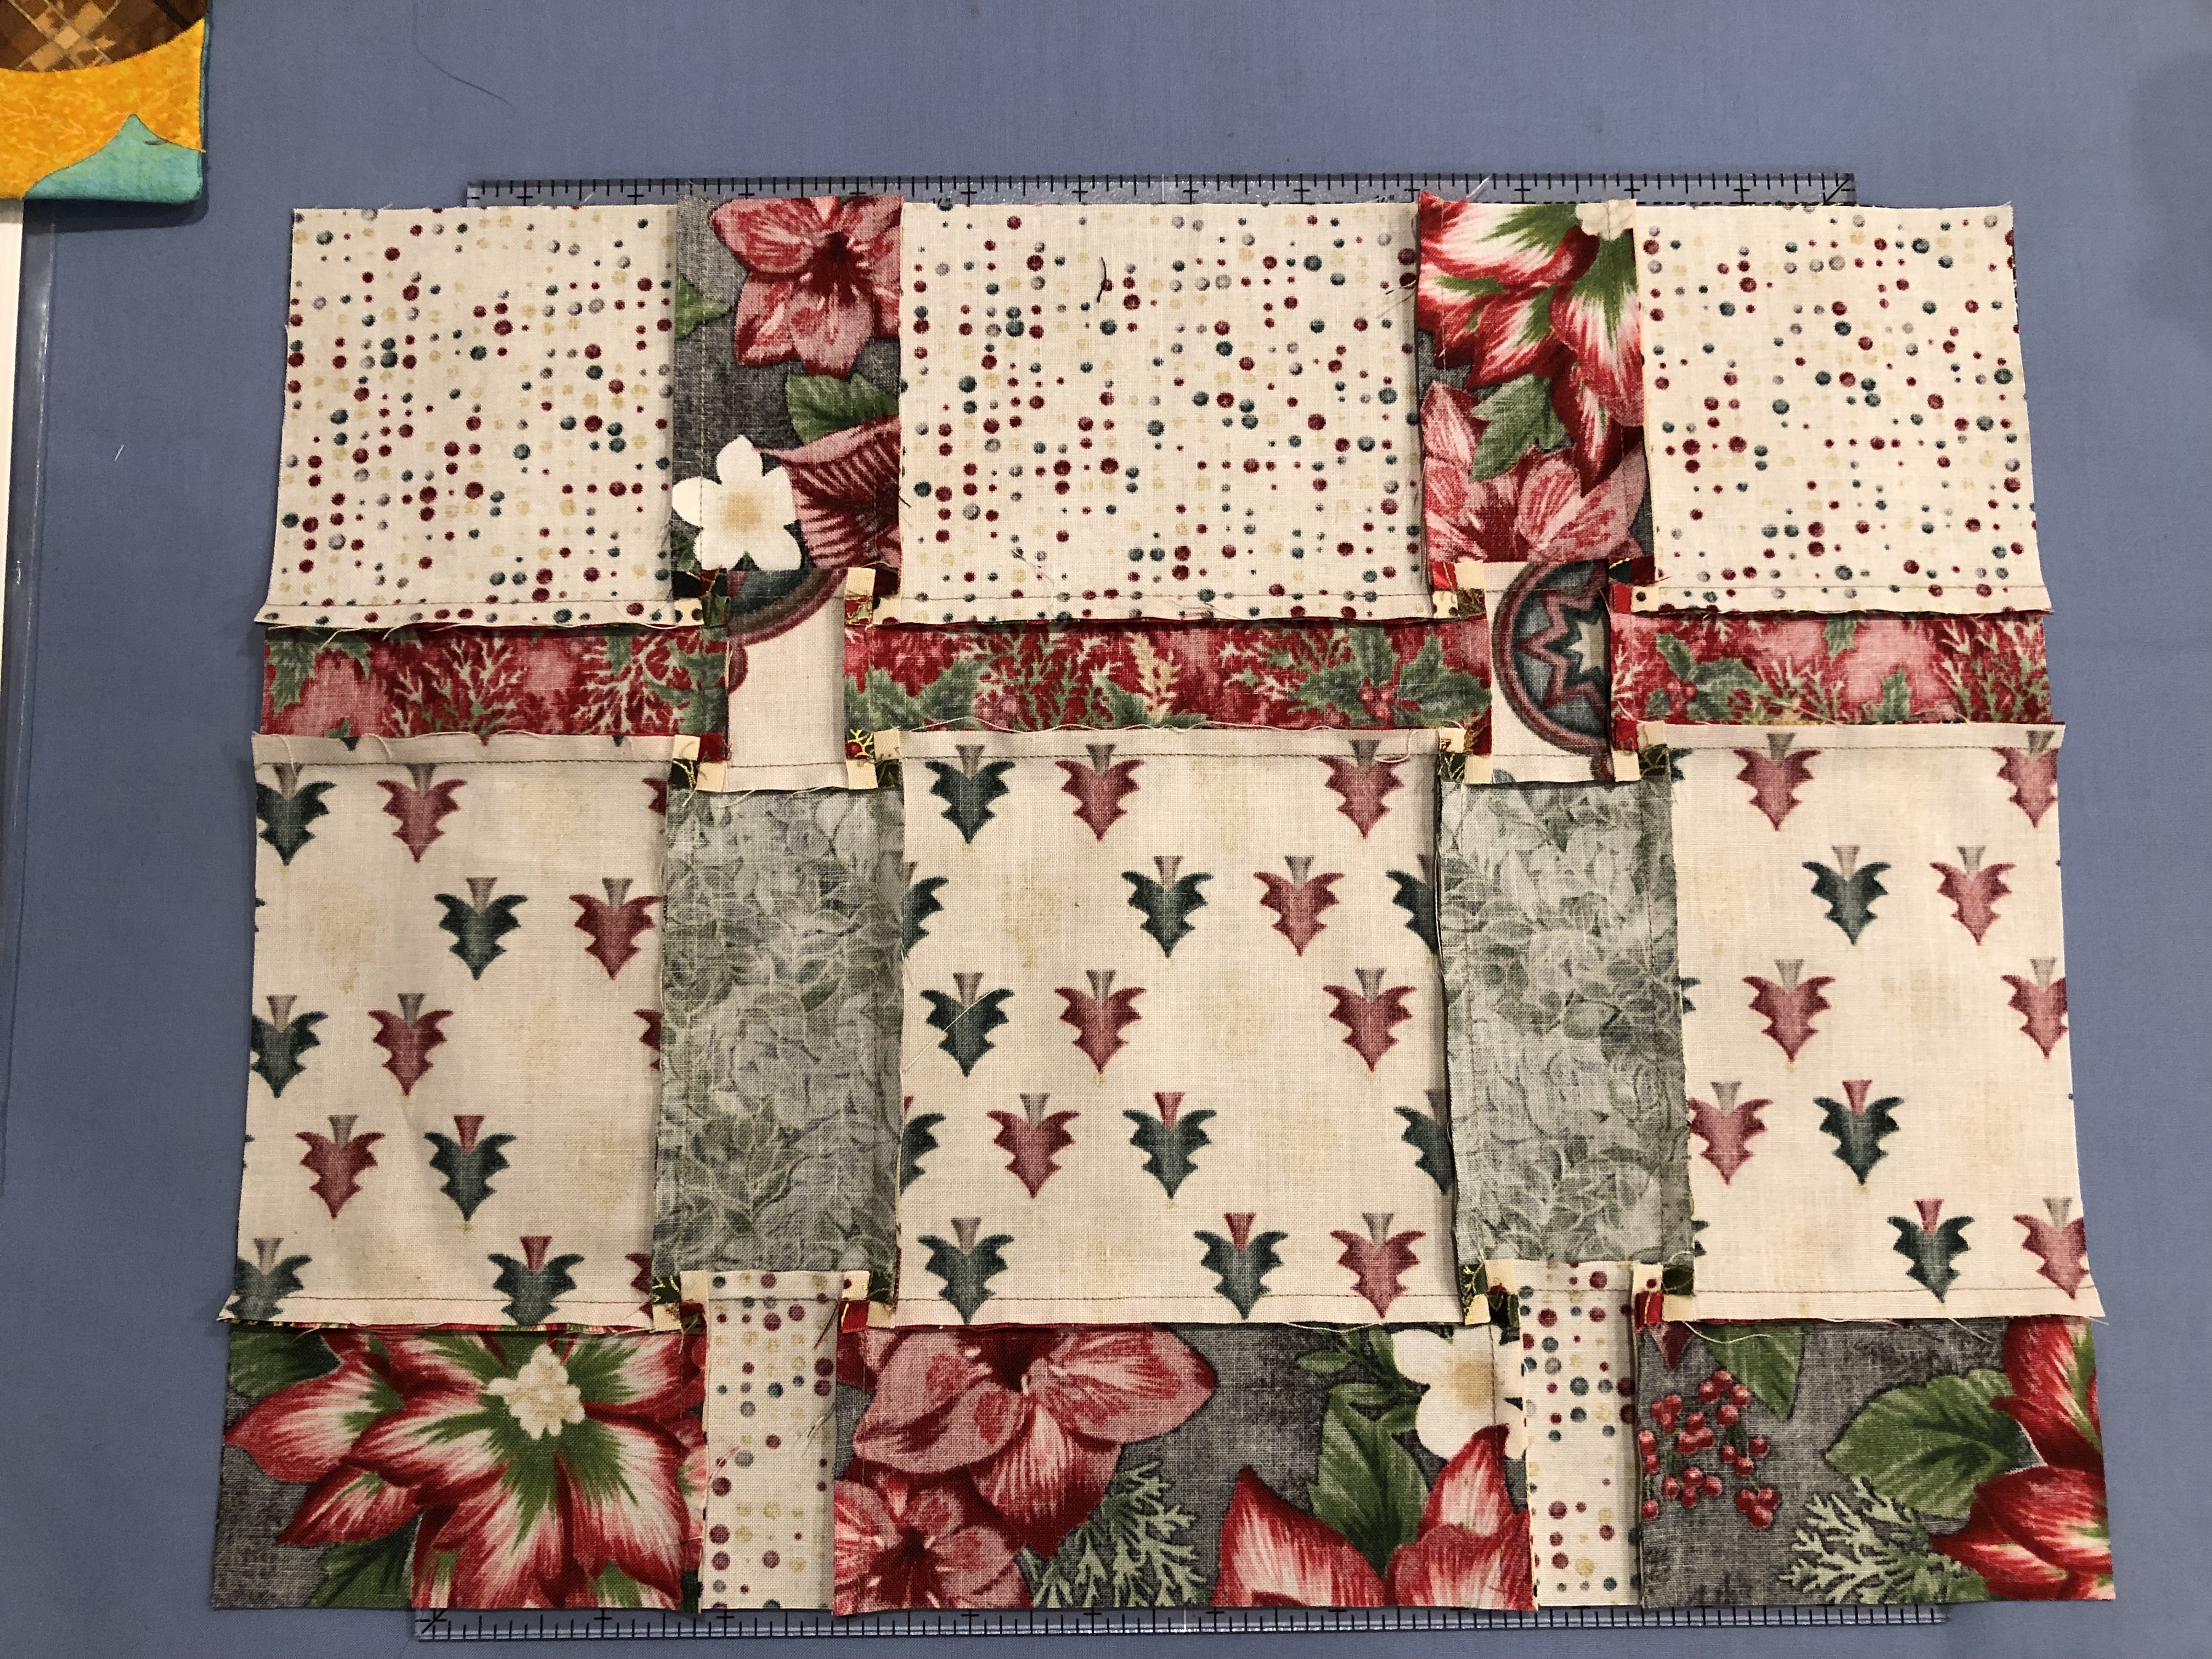
- Sew them back together again. Now you have your place mat top.
- Now it is time to make a back. Because I was tired of not getting done in time, I went simple this time. I ironed my rectangles toward the larger pieces and pressed very flat. I measured the top to know what size to cut my back. Since I have 6 fabrics and 6 place mats, I cut one rectangle to match top from each fabric.
- I decided not to bind my place mats which means my next step was to layer the top and bottom right sides together. I prefer my top at the top of the stack and laid on my batting and cut to size. I spray baste my batting because I hate pinning. Even more, I hate when my layers shift.
- I stitched all the way around the outside with a 3/8 or 1/2 seam starting at least two inches in on the smaller side. ( I typically will pick towards right bottom because I believe (old wives tale?) that people won’t notice. I left at least a 3 inch opening. I would definitely not leave anything smaller.
- After stitching around edge, snip excess material from corners making sure not to cut stitching. Turn right side out, poke out the corners, and smooth the seam flat before folding the opening and clipping or pinning it. I like to iron my opening once I have it like I want it (turned raw edges in). I do NOT hand stitch my opening close. (I use to). But the reason I originally sew with a 3/8 or 1/2 seam above is so I can now sew one more time around outside with 1/4 inch seam and there is no need to hand stitch the opening close. Because I spray basted the batting to the backing, I normally do not have any issue with things wrinkling.
- I highly recommend that you do at least some quilting even if it is nothing but stitching in the ditch. If you do not, over time the layers will wrinkle (That’s experience talking!!) If you are really using your place mats, then they will be washed frequently. Quilting insures the layers stay put as well as the seams. I find that place mats are a great thing to learn or practice new walking foot or free motion techniques I want to try.
- Ready! Set! Eat!
Making the Napkins
Once again, I don’t actually have a pattern but I decided this go around to make 13″ square napkins. I have made them as small as 10″ before. After research, I discovered there is no standard so do what you like. I have done single layer hemming the raw edges, but we do not like them so mine are a front and back. If I don’t have enough of a color, I will sew pieces together to make the square I want. My aim is to make matching napkins to my place mats, not necessarily to each other. For my Christmas napkins I looked at my leftovers and decided to make scrappy napkins. Each side is two different fabrics sewn together (one seam only). I also got all fancy and turned so the seams made a cross in the middle giving me more versatility when setting the table. You will see here that I folded them into triangles. I could have done them with napkin rings or rectangles or… Well you get the picture. I could have made them the same on the front and back. They are sewn together right sides together the same as the placemats (except NO batting). Anything goes. Once again, my decisions are based on my fabric and the leftovers.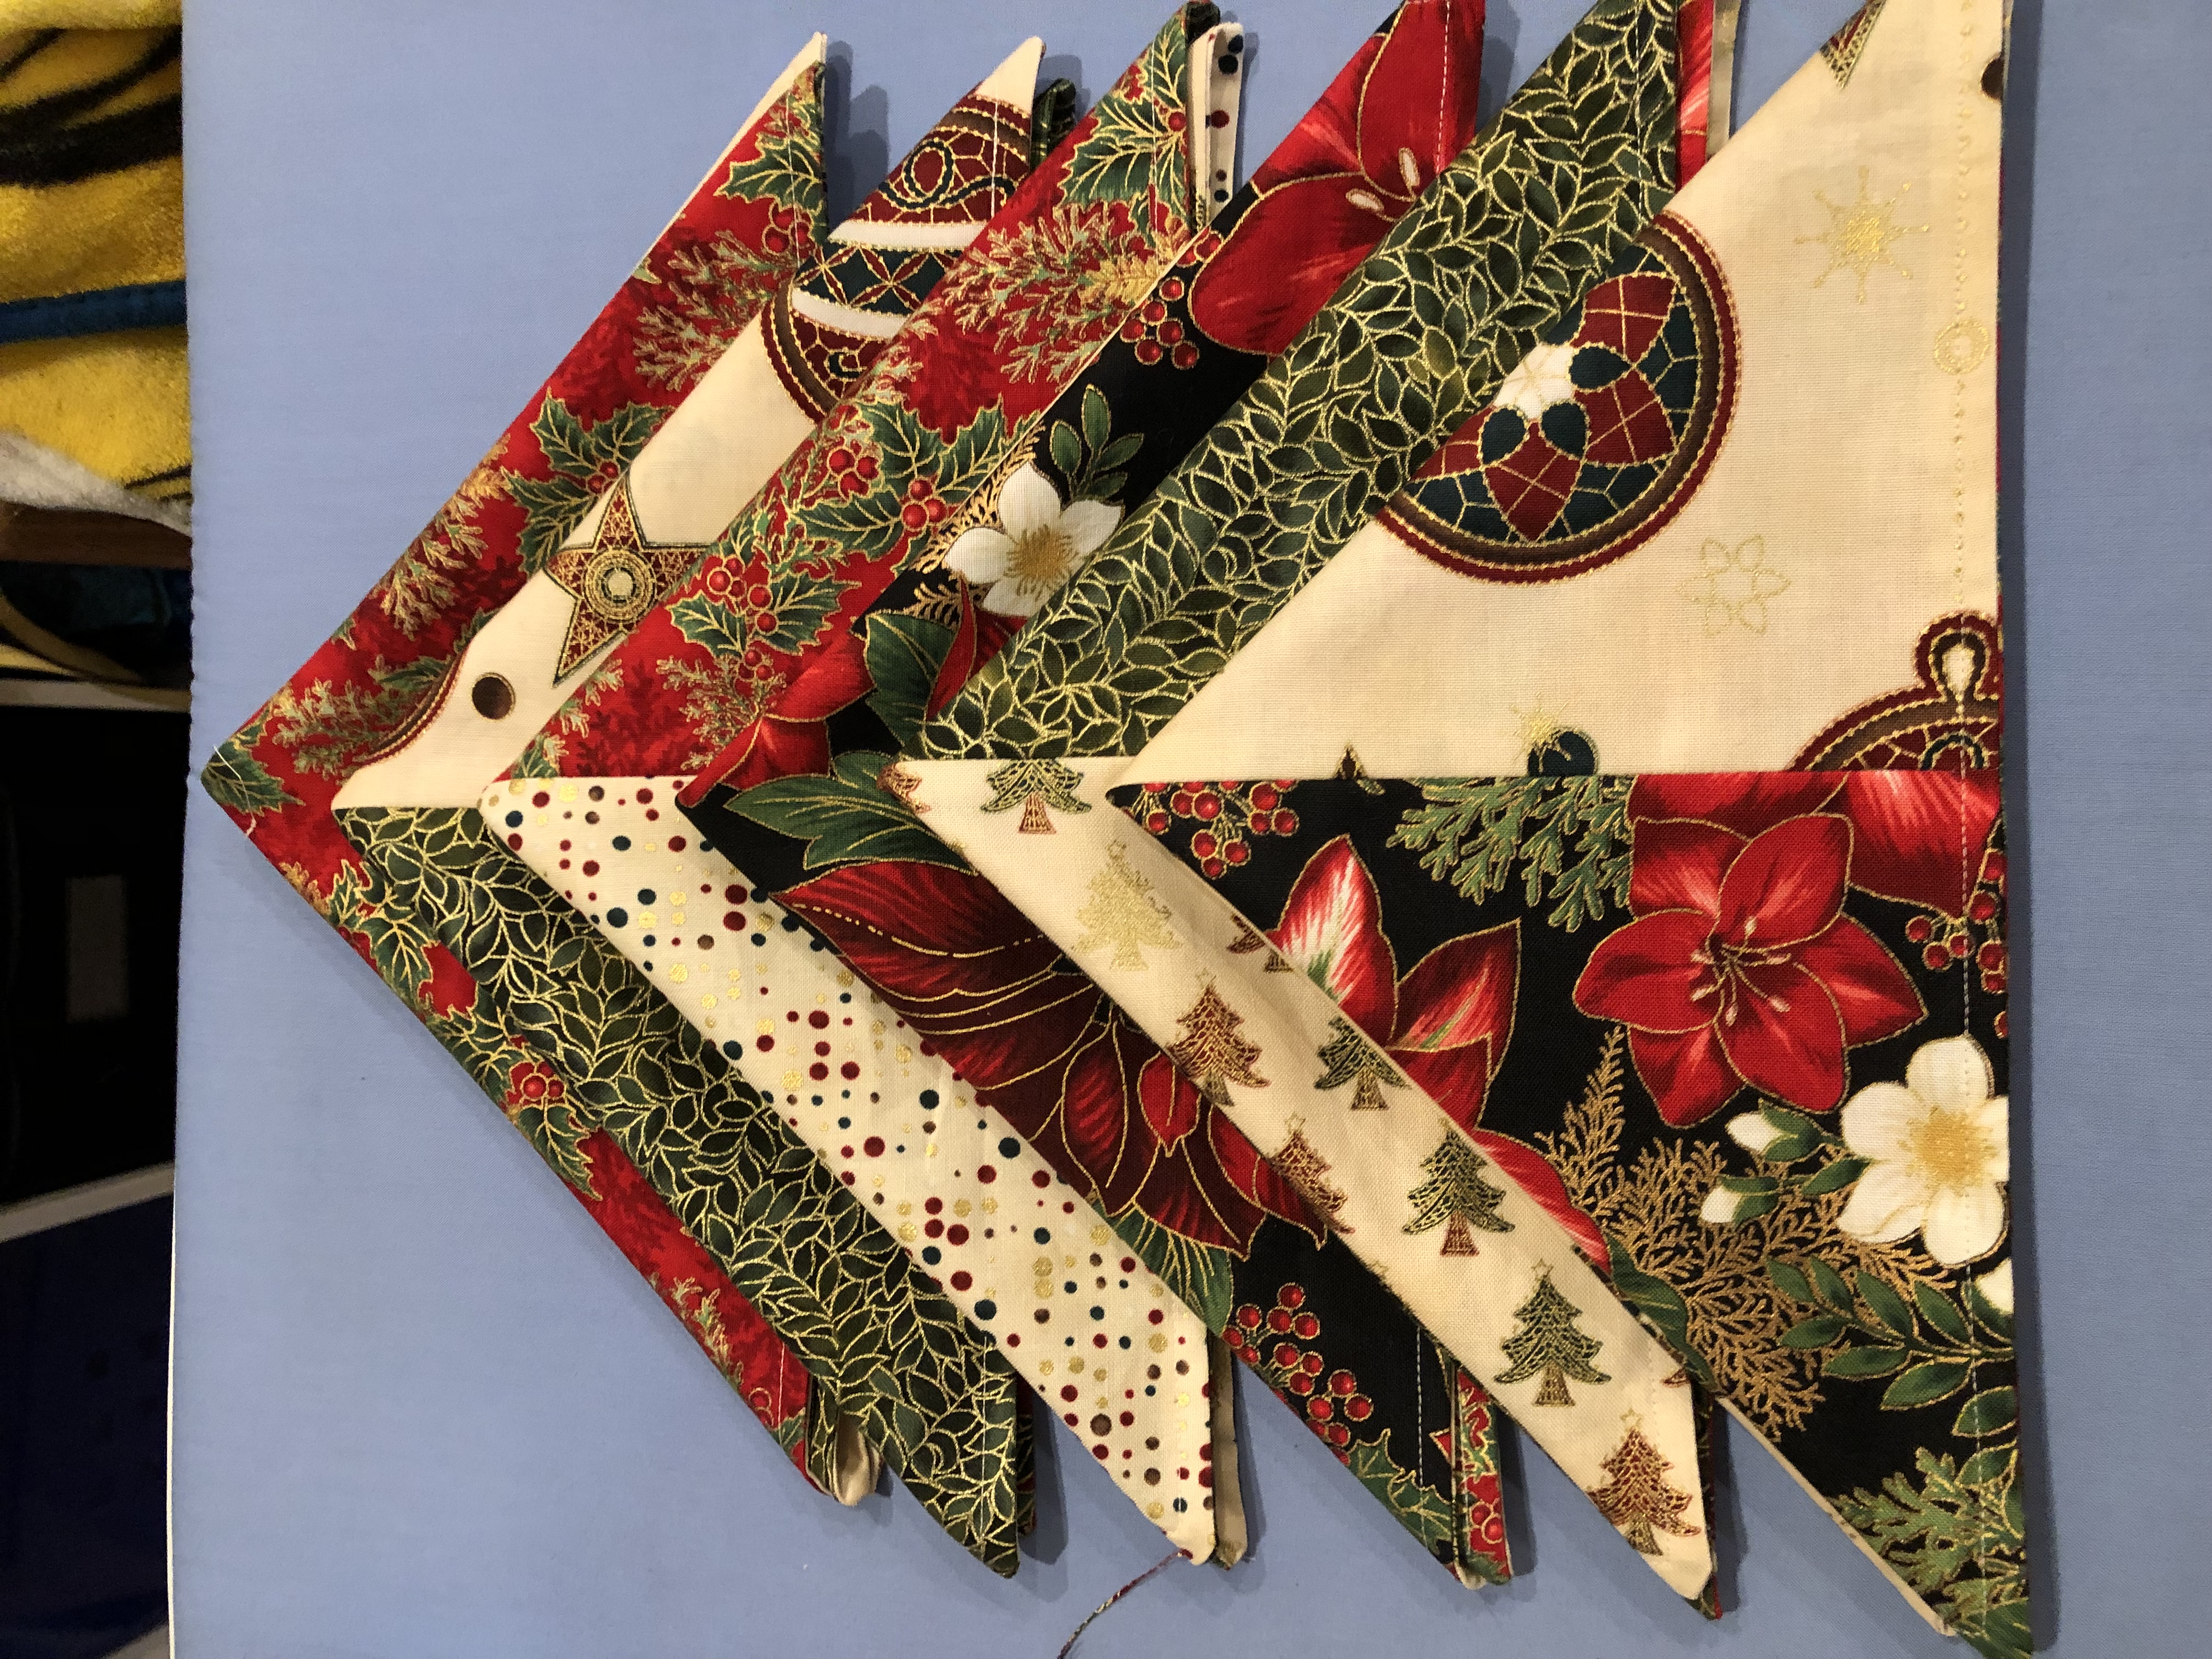
Making the table runner
My new island looked so naked which is why I decided I really need to make a table runner. Looking over my leftovers, I decided on piecing my leftovers together fairly randomly. I did try to keep my dark/light thing going. Some of my strips were super long so I went with my shortest ones as my guide on how wide it would be. Big surprised that was 14″. Some of the larger pieces of fabric could be turned different. I just did it until it looked right. It started off approximately 14″ wide. After all the strips were sewn together….well let’s say it needed some evening up. I decided to do that with the back already layered.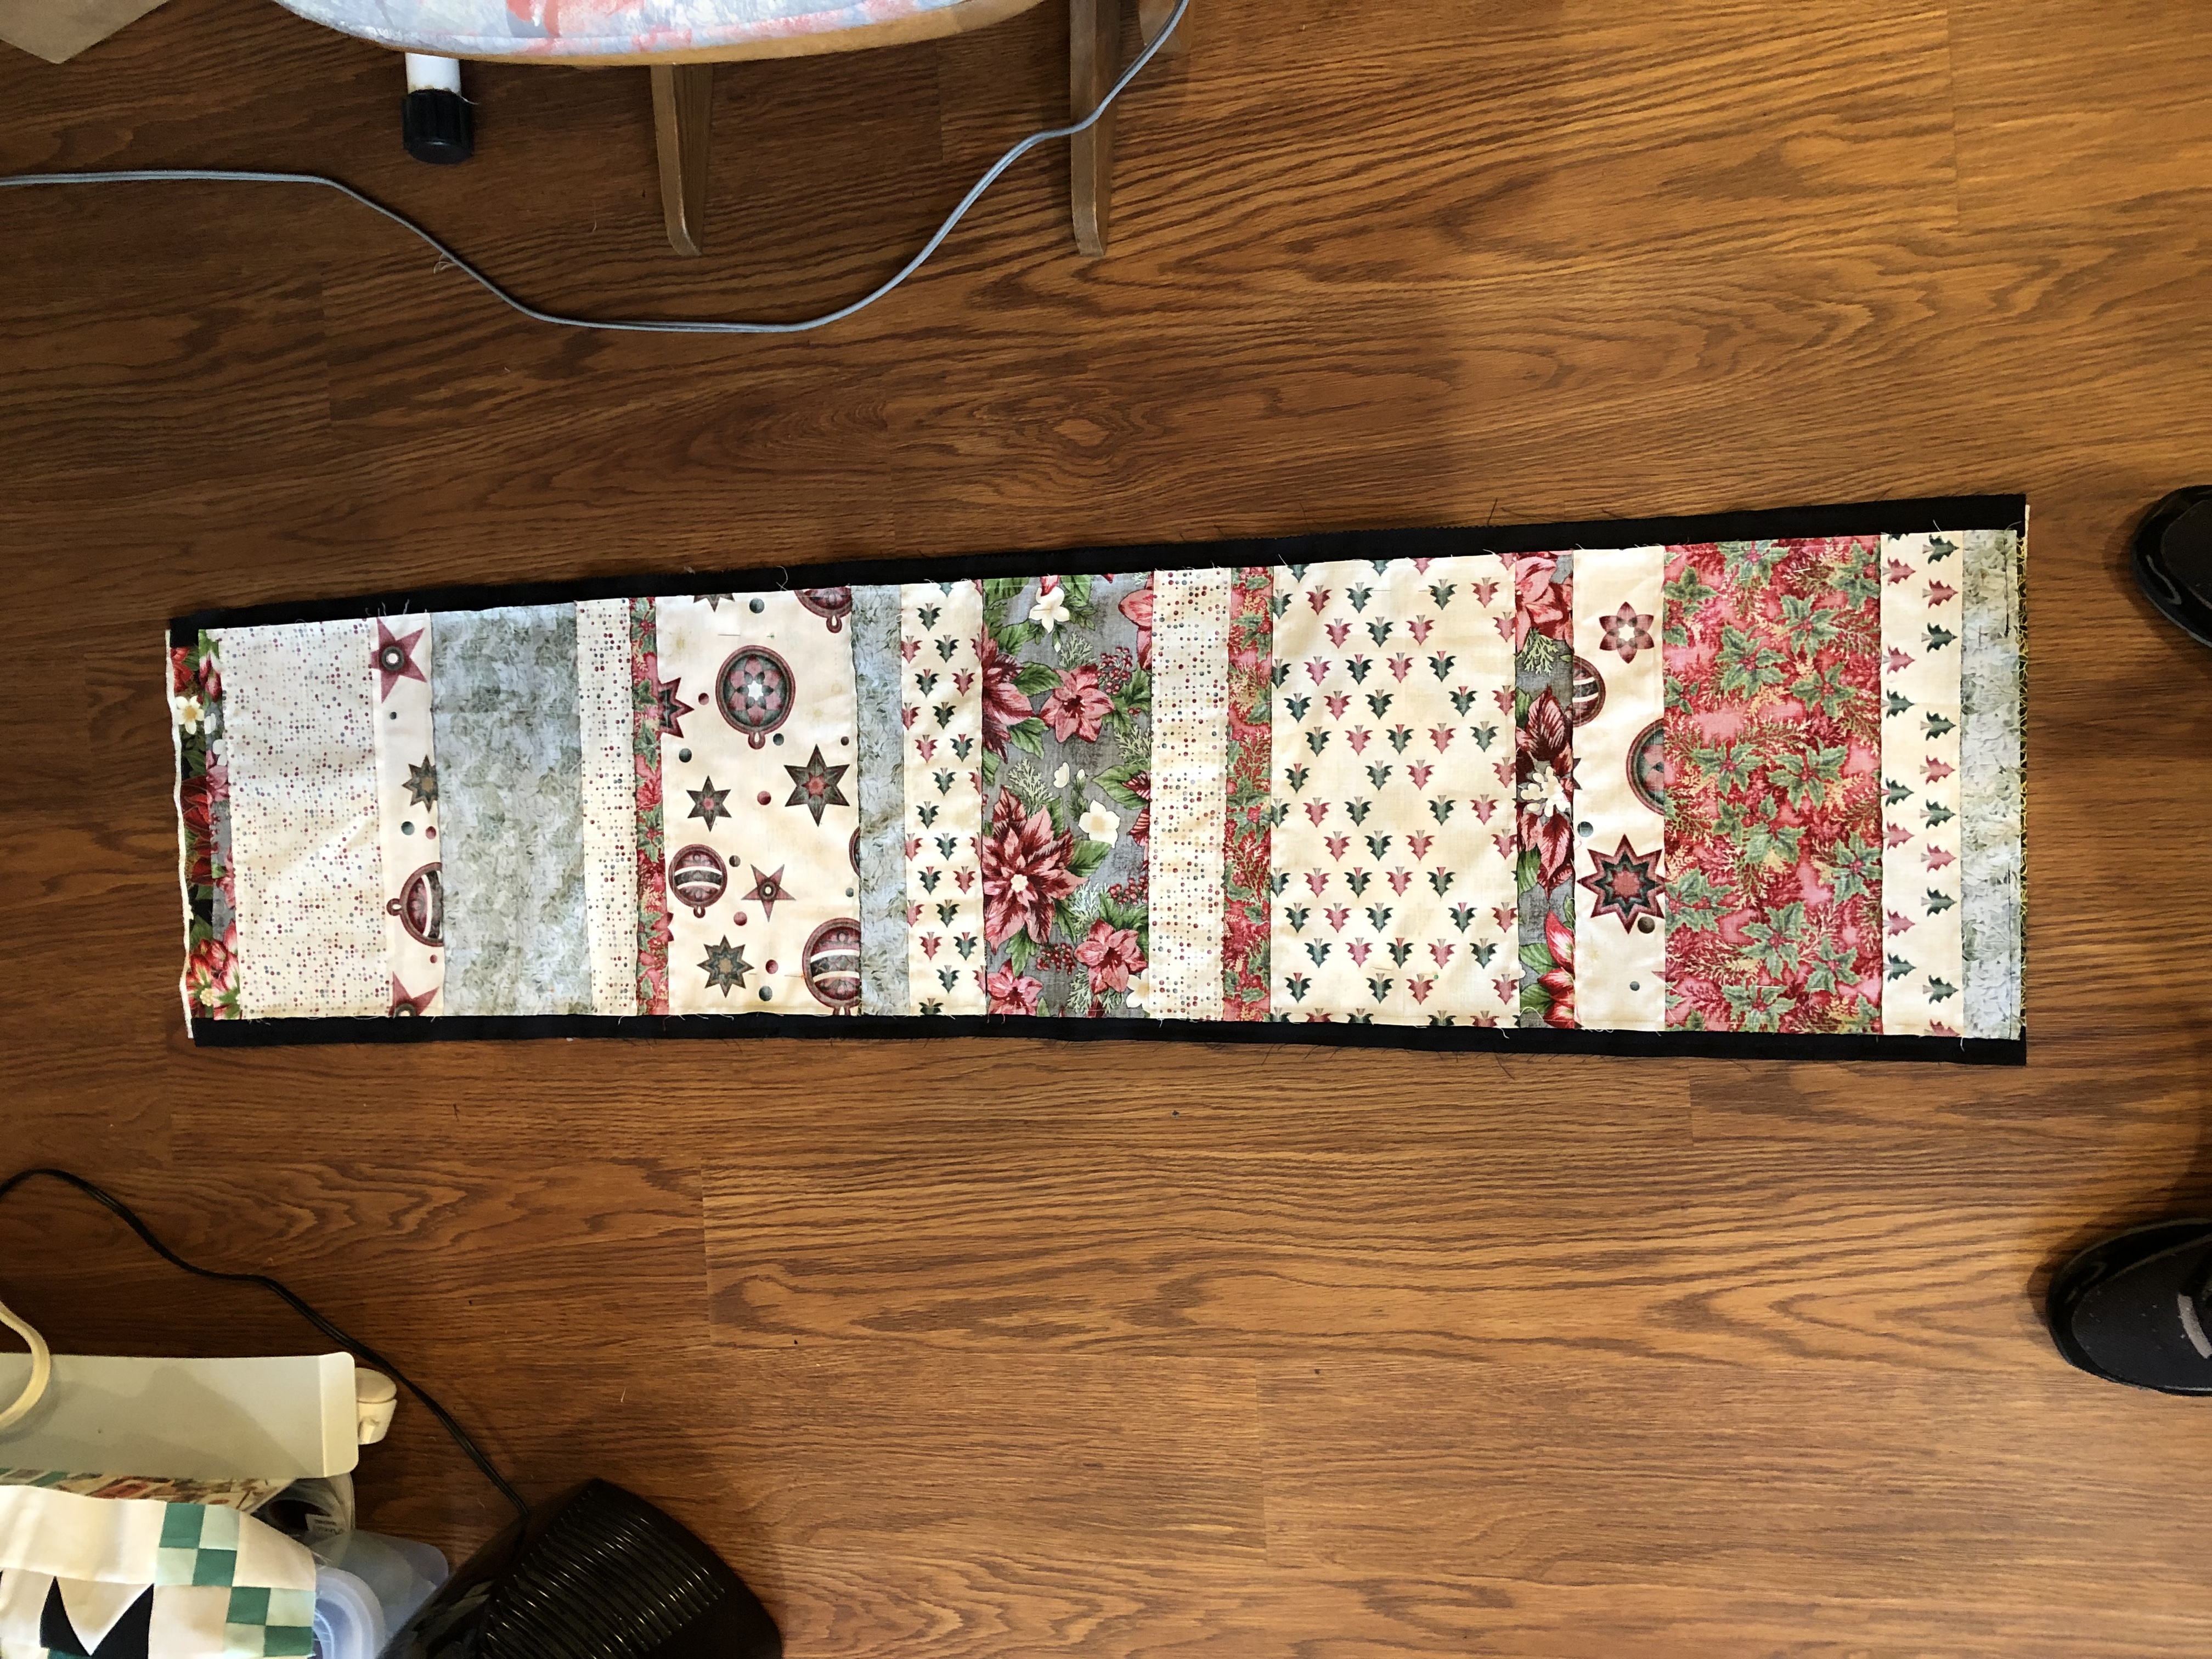
Problem number two. I did not have enough of any one fabric to make the back. I took my largest pieces and laid them out to make sure I had enough. Whew!!! Yes!! No trip to the store. A matter of fact, I still have leftovers. I laid both layers together (after ironing flat) so that they matched and trimmed to be same. With my island, I decided I did not like all the cream so I improvised and added a side black strip thinking it would be easier than binding. NOT! Next time I will be doing binding. It was a pain in my … butt. Finally got it together this past Saturday and now had to dwell on the quilting. Sunday I decided on pinstrip grid with my walking foot per Leah Day’s Explore Walking Foot Quilting Book. Love how it turned out. So glad it is done.
What’s left?
Wow! This post is way longer than I thought. Maybe I should not have put such detailed instructions on how I made them. Well anyway. I still have a wee bit of fabric left. I made two mini dresdens thinking they would be potholders. They are way too small to be potholders at 7″ so they will be hot pads instead. Of course, hot pads can be used as potholders in a pinch. I still have to quilt them this upcoming weekend. Since they were an after thought, I am good with this. I still have just a little bit more fabric left. Maybe mug rugs?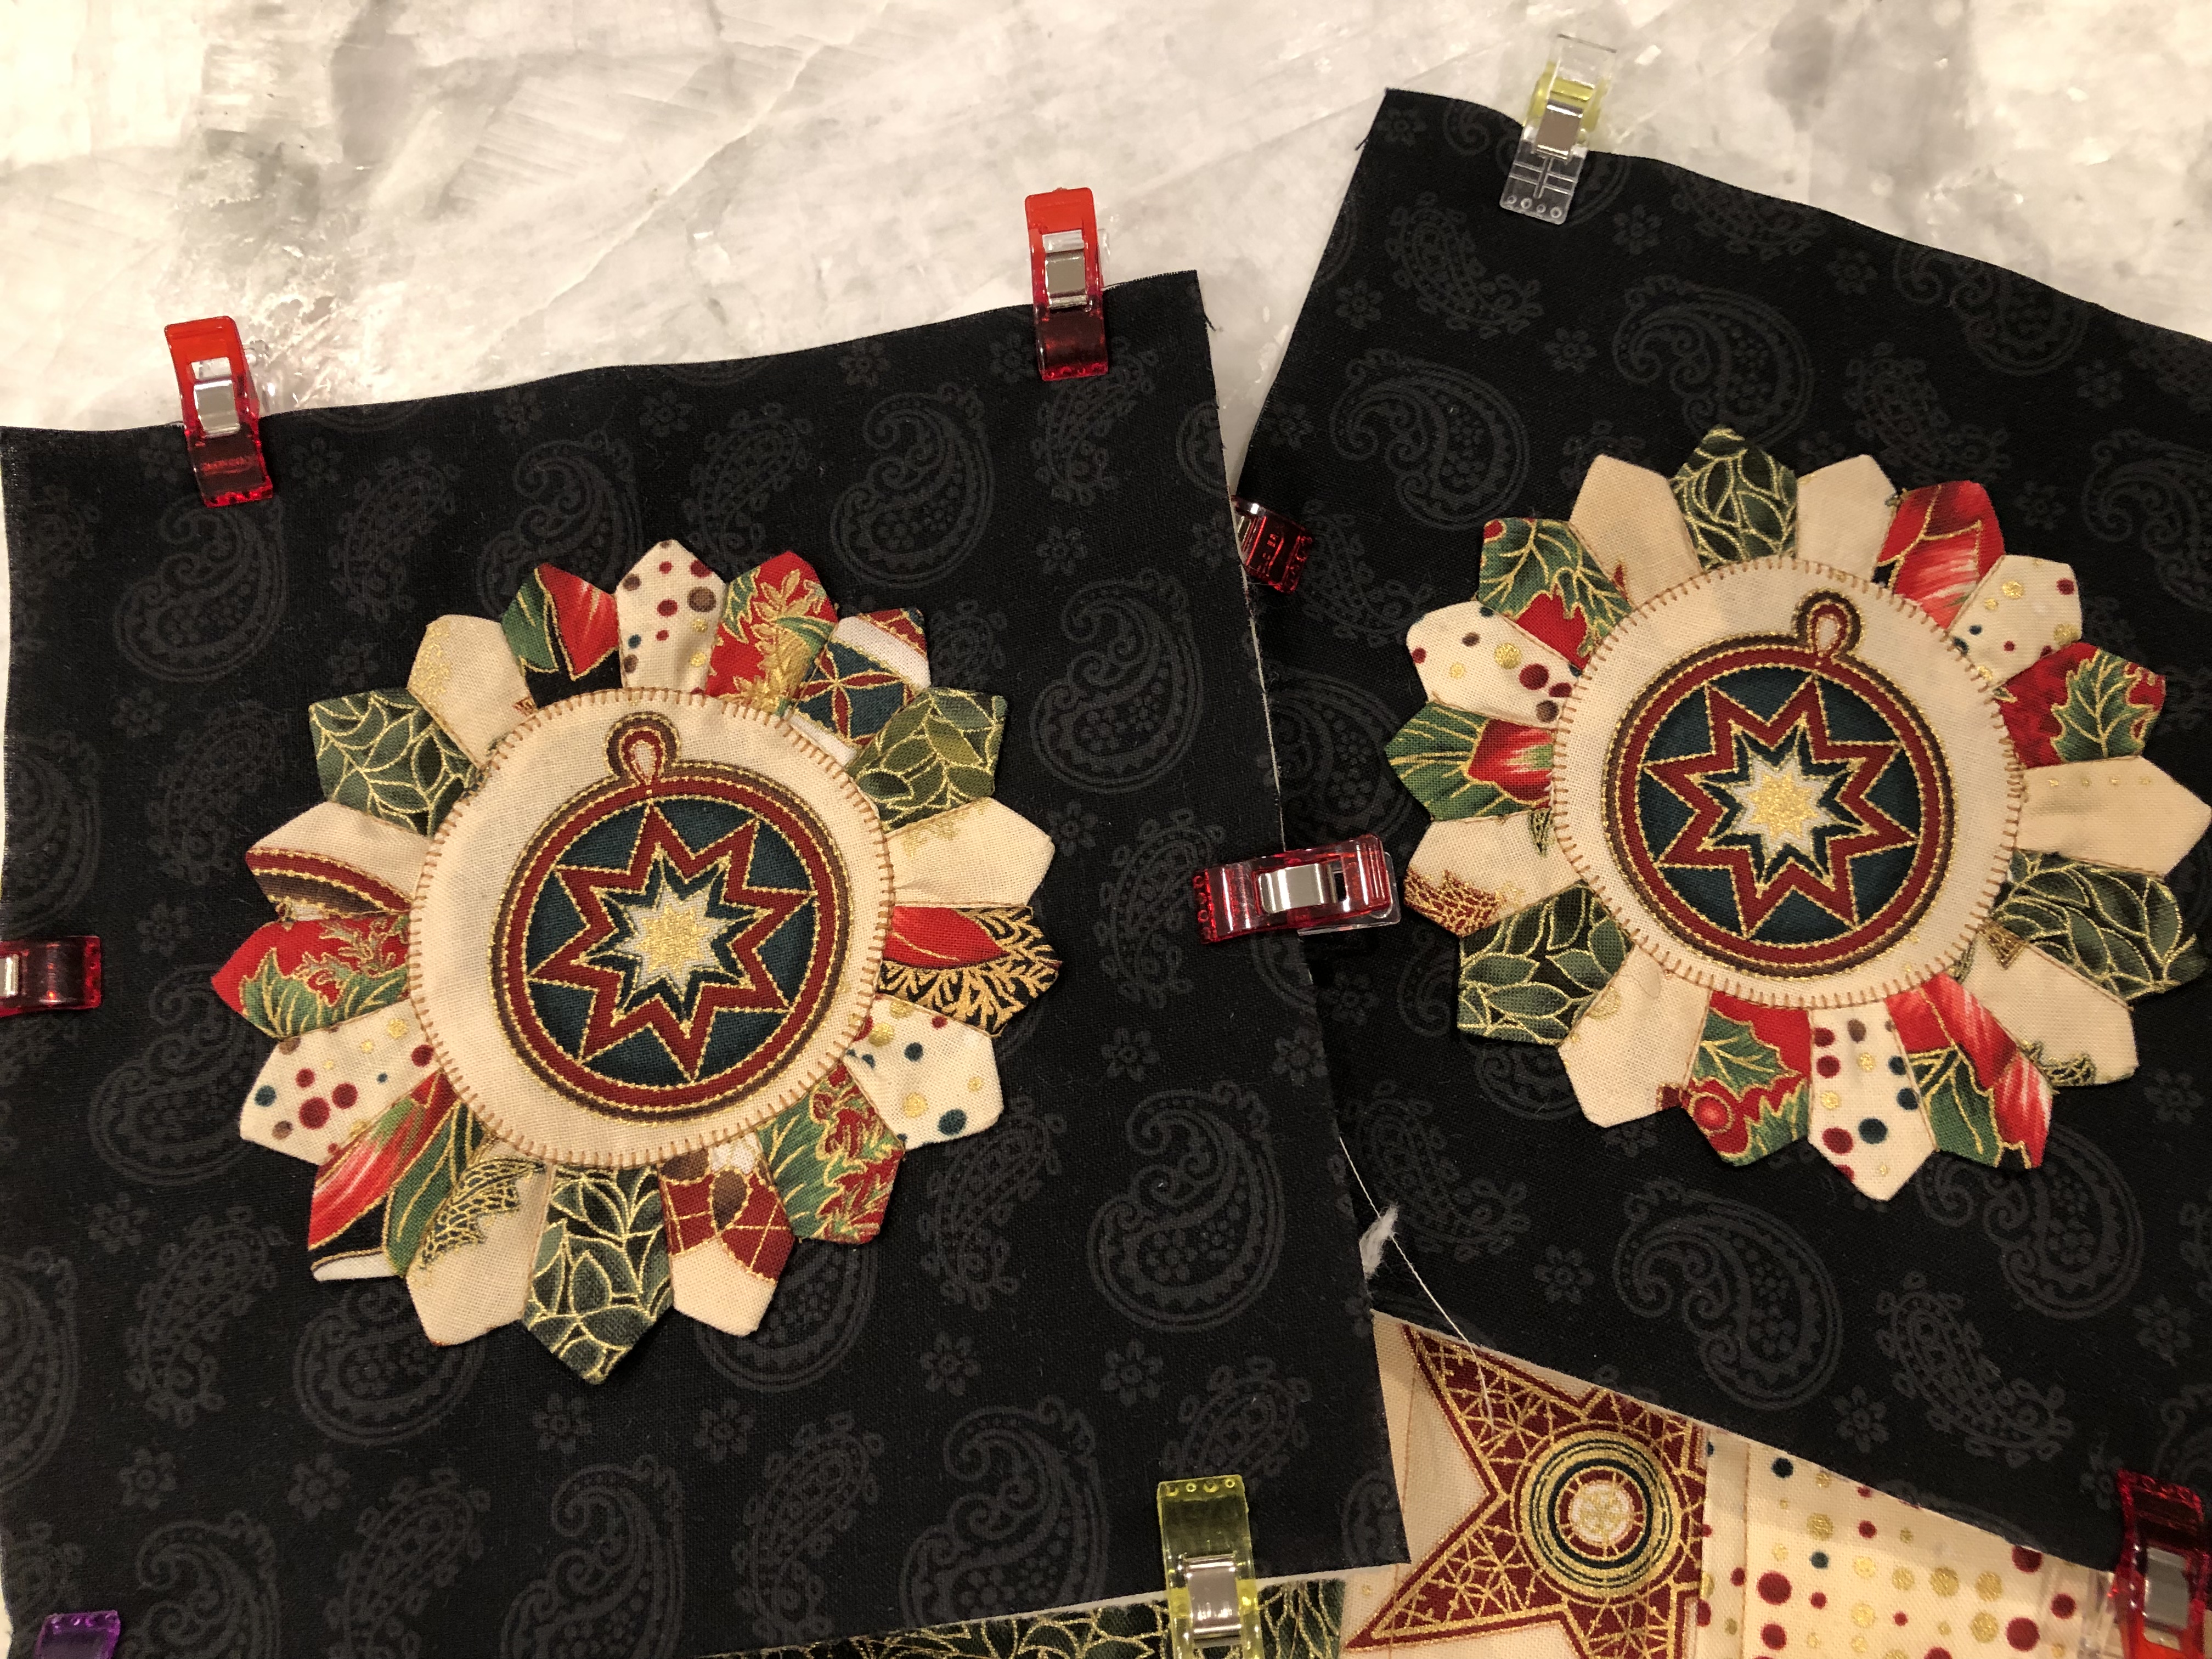
Elm Street One Monthly Goal Linkup January finish
I am linking up with Elm Street Quilts this finish. I am very pleased to have this project done. Maybe someone will have found something useful. Have a great last day of January!
The tablerunner and napkins were on my 2019 finishalong goals which I am linking up to with Capitola Quilter.
From Sunny California,
Peggy Stockwell
So pretty! Thanks for linking up with Elm Street Quilts One Monthly Goal and congrats on your finish!
Thank you Patty. The linkup is great for people like me who need a wee bit of a push.
Everything turned out beautiful! I’m definitely a fan of a well dressed table!
Until I go my new Island I didn’t really have any motivation. Now it is the center piece of every visit.
The mini Dresden’s turned out awesome! Loved the napkins too!
Thanks!! I loved how everything turned out.